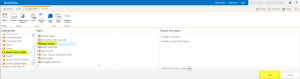
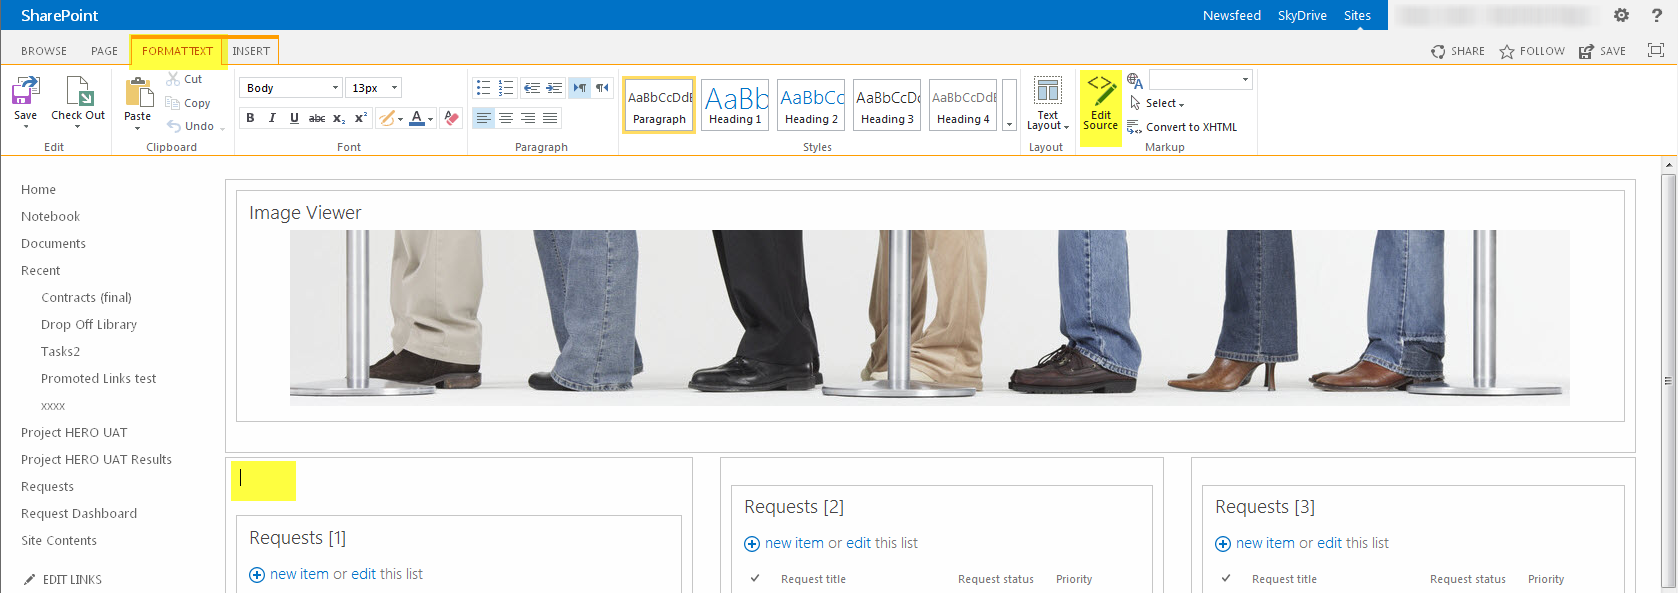
If you’ve built any new wiki pages in SharePoint 2013, you may have experienced some issues getting your web parts to line up nicely–particularly if you’ve modified the text layout of your wiki page to have multiple side-by-side columns. The columns make it easy to line up multiple app parts side by side, but the wiki pages’ tendency to add in extra paragraph spacing above some of your app parts can make it hard to line up all your app parts on the same vertical axis point. Here’s an example of a page that is suffering from some extra paragraph spacing:

As you can see in the shaded yellow box, I’m getting an extra paragraph of space above my app part in the left-most column of my page. These extra spaces seem to occur on wiki pages specifically, and usually in the left-most column of my page.
I could solve this problem by creating a Web Part Page instead of a Wiki Page (since web part pages don’t throw in these extra spaces), but I still wanted to figure out how to troubleshoot this type of issue on a wiki page.
Here are the steps I followed to create the wiki page shown above:
- Go to Gear > Add a page
- Type in a name for your page. (I named mine Queue.) At this point a new wiki page is created and saved in the Site Pages library of your site.
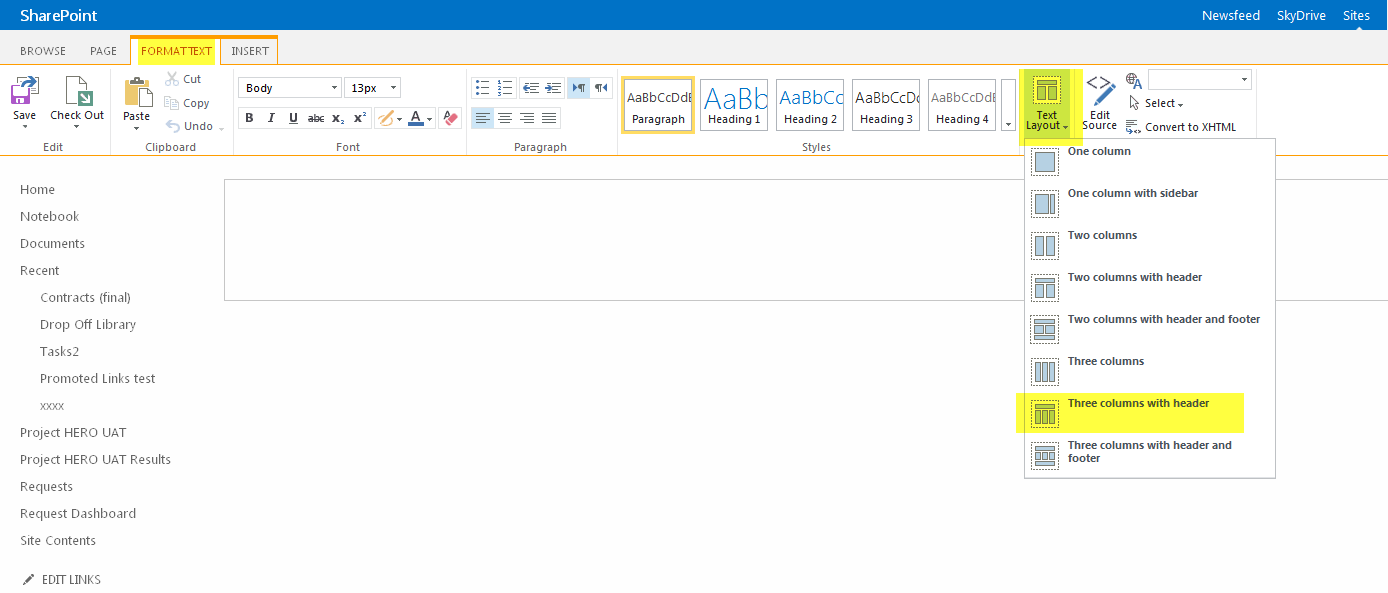
- Set the text layout for the page. Go to your Format Text ribbon, click on Text Layout and select Three columns with header

- Now you’re ready to insert your web parts. Place your cursor in your header zone, click on the Insert ribbon and select Web Part.
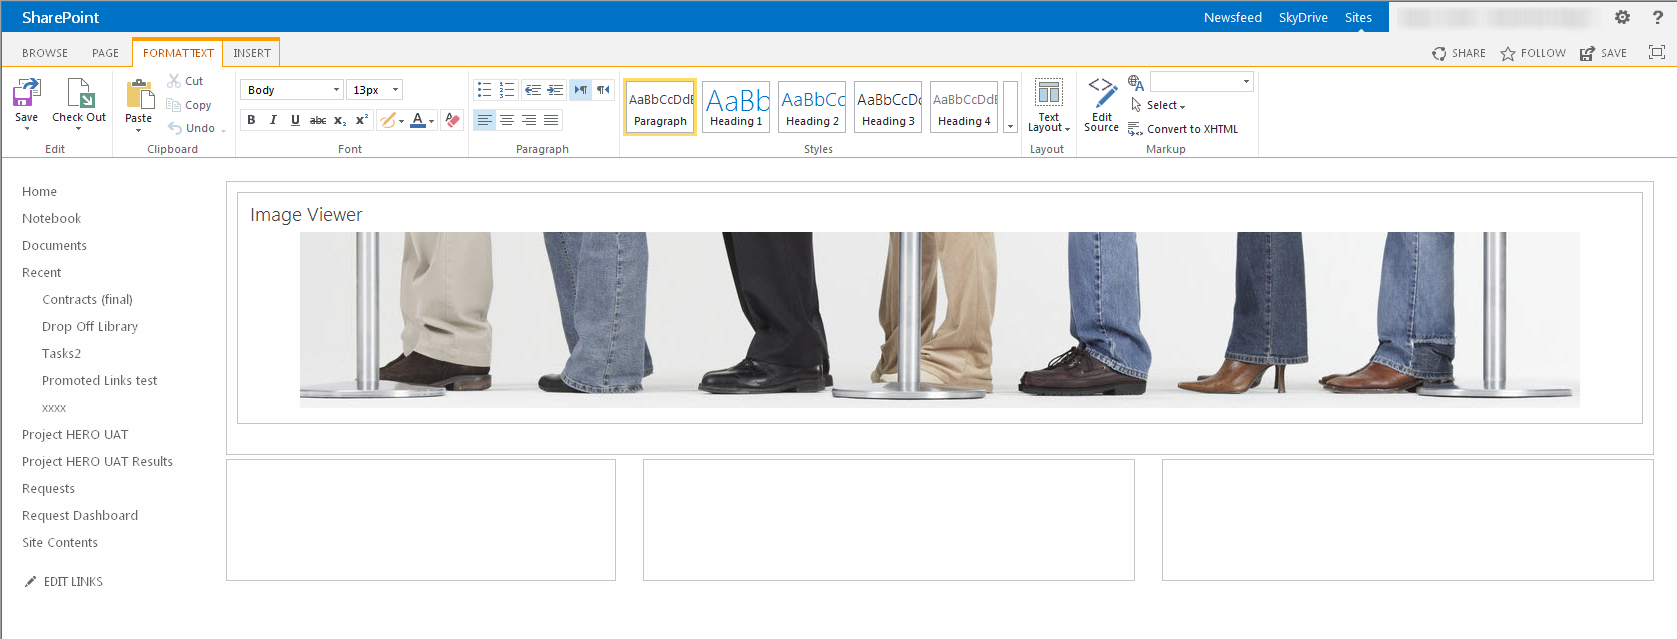
- We’re going to insert an image here, so click on the Media and Content web part category and then select Image Viewer and click on Add.
- I’ll add in my image by clicking on the open the tool pane hyperlink in my new Image Viewer web part. Here’s our finished image:

- Now we’re ready to add some app parts to the page to render our list data. I’m going to add 3 app parts to the page–one in each of my page’s 3 columns. Here are the steps I followed to add each app part:
- Click into a column.
- Click on the Insert ribbon and select App Part.
- Choose the list or library you want to use and select Add.

Once I finish adding my 3 identical app parts to my page, this is what I see:
I tried simply placing my cursor in the extra space and hitting delete, but that deletes my app part entirely. The best way to remove this extraneous spacing is to edit the source of the page and remove the offending HTML paragraph tags. Here are the steps to perform this cleanup:
- Place your cursor in the extra paragraph space you want to get rid of.
- Click on the Format Text ribbon and select Edit Source.

- Notice the spare paragraph tag located at the top of your HTML Source. (Shown highlighted in yellow below).
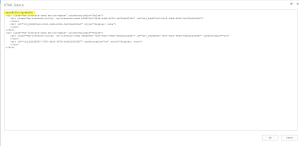
- Highlight all the text on line 1 of your HTML Source and press your Delete key to remove it.
- Press OK to save your changes.


It did not work for me. However a hardcore approach was to switch the view to single column and then back into 3 columns and reposition the parts. The extra line disappeared and the parts were aligned nicely
This worked perfectly for me, thanks!