There are a variety of ways to add color coding to your SharePoint lists and document libraries, from embedding custom code on your page to creating data view web parts with conditional formatting in SharePoint Designer. The trick is determining which method works best in your situation. Not sure how to do that? Start with the basics:
- Understand your business requirements.
- Build your user adoption strategy.
You have to start with your basic business requirements. You need to determine what data you will be storing, how you will be storing it and when you will be surfacing it to key audiences. Since many of these questions may impact your use of color coding and conditional formatting, they’re critical to understand.
You also need to know how dynamic your users want their solution to be. Do they want to be able to tweak the specific shades of green you’re using? What if they decide that they no longer want to demarcate completed items in grey–instead opting for a nice shade of puce? If you build your color coding solution using custom code or a SharePoint Designer add-on, your average business users will (most likely) not be able to make color modifications on their own.
Once you have the basic business requirements down, you need to figure out what add-ons and additional features your users are dying to get their hands on. Do they get excited about having high-priority items display in red text? Do they want all the completed items in their weekly project tracker to show up in light grey font? Or are they color blind and see no value in having any color differentiation of their SharePoint data? If your users have a wish list of desired functionality that includes color coding a document library, list or calendar, you should be running (not walking!) to find any and every solution that will make their dreams come true. Delivering on your users’ wish list items will ensure smooth user adoption and easier change management.
I’ve used a variety of methods for color coding my SharePoint lists and document libraries. I’m using this blog post to share one of my color-coding favorites–the Path to SharePoint solution that uses embedded HTML strings in SharePoint calculated columns to apply color coding. Here’s an example of the types of color coding you can do with this solution:

(image source: Path to SharePoint, http://blog.pathtosharepoint.com/2008/09/01/apply-color-coding-to-your-sharepoint-lists/)
Setting up this type of color coding is fast–literally 5 minutes of work per list view you want to customize. But navigating the steps for the first time can be daunting. This blog pulls all the steps together in one easy-to-follow process. We’ll start with a business scenario, then move on to setup in both MOSS 2007 and SharePoint 2010. We’ll finish things off by discussing ways you can customize your new color coding.
Business scenario:
My company uses a SharePoint issue tracking list to store help desk support requests. All SharePoint users have the ability to go to this list and create new support requests as needed. When they go to the list and click on the Add new item link, they get a New Item form with the following basic input fields:
- Title
- Description
- Priority
- Due Date
When a user fills out the New Item form and clicks OK, the help desk ticket information is automatically routed to our help desk team for resolution. To ensure that high priority help requests are easily visible, our help desk manager wants the Priority field in our SharePoint list view to have automated color coding. He’d like all support requests that are High priority to display with a red icon. All Normal priority requests should display with a yellow icon and all Low priority requests should display with a green icon.
And while the team is currently using MOSS 2007, they have plans to upgrade to SharePoint 2010 in the next 3 months. So any color coding solution(s) that we build must work in both platforms.
Solution:
There are a few ways to get this done–including building custom data view web parts in SharePoint Designer. But since our help desk manager wants to modify the colors of his priority icons on the fly (without using SharePoint Designer), we’re going to build out these custom color indicators using HTML encoding embedded in calculated columns. We’ll be using the Priority column that comes with the default Issue Tracking list as the trigger for our color coding. (In other words, the value set in the Priority field will determine whether green, yellow or red color coding is applied to our new calculated field.)
While this solution works in both MOSS 2007 and SharePoint 2010, the setup is a bit different in each platform. Here are the required elements for both platforms:
| MOSS 2007 required elements | SharePoint 2010 required elements |
|
|
The remainder of this blog post outlines MOSS 2007 setup steps, SharePoint 2010 setup steps and cool ways to customize your new color coding.
-
Go to http://pathtosharepoint.com/Downloads/Forms/AllItems.aspx, expand the HTML Calculated Column group header and download a copy of the TextToHTML-v2.1.1 text file.
-
Upload the HTML script file to a document library on your site. As you can see in the screen shot below, I uploaded my file to a document library named Site config files. It doesn’t matter what document library you use to store your file, but make sure all site users have at least read-only access to the library you use. This will ensure the HTML script file can be accessed to render the color coding you’re going to set up.

-
Validate that the SharePoint list or document library that you want to color code is set up with a Priority field with the following basic settings. (Note that these settings come with the out-of-the-box Priority site column, which you can add to your list or document library.)

-
Browse the color formatting options at http://blog.pathtosharepoint.com/2008/09/01/apply-color-coding-to-your-sharepoint-lists/ and determine which option (e.g. traffic light indicator, font color shading, background shading, KPI icon indicator) you’d like to implement.
-
Copy the formula provided for your desired formatting. In my case, I’m looking to implement a traffic light indicator so I copied the following formula:
="<DIV style=’font-weight:bold; font-size:24px; color:"&CHOOSE(RIGHT(LEFT(Priority,2),1),"red","orange","green")&";’>•</DIV>"
-
Add a new calculated column to your SharePoint list. Paste the HTML formula string you copied into the new column’s Formula field. Click OK to save your changes.

-
When you return to your list view, you’ll see your new calculated column displaying with <DIV> tags. Not very attractive.

-
To correct this issue, we’re going to add our HTML script to the page. Click on Site Actions > Edit Page.
-
Click Add a Web Part and add a new Content Editor Web Part to your page.
-
Move your new Content Editor Web Part (CEWP) to the bottom of the page. You need it to display below your list view web part.
-
Click on the CEWP’s open the tool pane hyperlink.

-
When the web part configuration panel appears, place your cursor in the Content Link field and enter the location where you stored your HTML script file. Click OK to save your changes.


That’s it! Your formatting is applied and your page should now display your new color coded field. Here’s a screen shot of my finished view, complete with a Priority Indicator column that displays red, yellow and green traffic lights that correlate with the priority level of each help desk request:

Now that you’ve set up color coding on one list view, you can continue adding more color coding to this view or add color coding to other views. Note that you will need to add one CEWP to each list view page that you want to color code. There is no limit, however, to the number of calculated columns with HTML encoding you can add to your list.
-
Validate that the SharePoint list or document library that you want to color code is set up with a Priority field with the following basic settings. (Note that these settings come with the out-of-the-box Priority site column, which you can add to your list or document library.)

-
Browse the color formatting options at http://blog.pathtosharepoint.com/2008/09/01/apply-color-coding-to-your-sharepoint-lists/ and determine which option (e.g. traffic light indicator, font color shading, background shading, KPI icon indicator) you’d like to implement.
-
Copy the formula provided for your desired formatting. In my case, I’m looking to implement a traffic light indicator so I copied the following formula:
="<DIV style=’font-weight:bold; font-size:24px; color:"&CHOOSE(RIGHT(LEFT(Priority,2),1),"red","orange","green")&";’>•</DIV>"
-
Add a new calculated column to your SharePoint list. Paste the HTML formula string you copied into the new column’s Formula field. Click OK to save your changes.

-
When you return to your list view, you’ll see your new calculated column displaying with <DIV> tags. Not very attractive.

-
To correct this issue, we’re going to need to modify this new calculated column. Open your site in SharePoint Designer 2010.
-
Click on Lists and Libraries in your SharePoint Designer 2010 navigation bar. When the list of your site’s document libraries and lists display, click on the list or document library we’re working on.

-
When the list or document library details page displays, look for and click on the name of the view you’re applying color coding to. In my case, I am updating the All Issues view.

-
Once your view opens, click on of the fields that are displaying those ugly
tags. Notice that the <xsl:value-of> tag in the bottom right-hand corner of your screen lights up in yellow once your field is selected.
-
Hover over the <xsl:value-of> tag until a black dropdown arrow appears. Click on the dropdown arrow and select Edit Tag…
-
A dialog box will pop up with the following text:
 Place your cursor between the last quotation mark and the closing > bracket. Now type the text disable-output-escaping=“yes”
 -
Your Quick Tag Editor box should now read like this:

-
Click on the Quick Tag Editor box’s green checkmark icon to save your changes. Your SharePoint Designer page will refresh and your color coding will appear!
-
Click File > Save to save your changes.


That’s it! Your formatting is applied and your page should now display your new color coded field. Here’s a screen shot of my finished view, complete with a Priority Indicator column that displays red, yellow and green traffic lights that correlate with the priority level of each help desk request:

Now that you’ve set up color coding on one list view, you can continue adding more color coding to this view or add color coding to other views. Note that you will need to modify the <xsl:value-of> tag for each column you want to display in HTML format. There is no limit, however, to the number of calculated columns with HTML encoding you can add to your list.
Cool ways to customize your color coding
Now that you have your fields set up, you may want to start customizing the look and feel of your new color coding. Changing out the colors that display is quick and easy:
- Find the new color(s) you want to use. A wide variety of HTML color choices are available. Here is a site that features a variety of HTML colors that are supported in all browsers: http://www.w3schools.com/tags/ref_colornames.asp
- Once you find a new color you’d like to use, note the color’s name.

- Go to your SharePoint list’s List Settings page.
- Find and click on your new color-coded calculated column.
- Look at your field’s formula and find the words red, orange and green. These are HTML color names that are currently being displayed on your SharePoint site. To modify these colors, all you need to do is replace these color names with the new color names you want to use. If, for example, you wanted to change the color orange to the HTML color Violet, all you need to do is highlight the word orange and replace it with the word violet. Then click OK to save your changes.

Here’s a picture of my list view now that I’ve changed orange to violet. Notice that my “normal” priority items are displaying a violet icon:

But what if you want to make other changes–like using a different trigger field? It is quick and easy to change the name of the field you want to trigger your color coding from. Just go to your calculated column, find the word Priority and change it to the name of the field/column you want to use.
The more difficult bit is changing the valid values that you want to trigger off of. The color coding formulas provided assume that you have a choice field with valid values of:
- (1) High
- (2) Normal
- (3) Low
If you want to trigger color coding off of different values, you will need to tweak your calculated column formula. Fortunately, the fantastic folks at Path to SharePoint have already anticipated this need and have written a follow-up blog post with more formula examples. Take a look – http://blog.pathtosharepoint.com/2008/12/09/color-coding-more-examples/

If you want to skip the XSL step, you could use our free HTML Calculated Column:
http://www.pentalogic.net/sharepoint-products/free-stuff/html-calculated-column
No need To use pentalogic neither go to designer to write extra code.
Follow all the steps given by Sarah Haase
i.e. steps 1 to 3,
in step 4 all you need to do is select the type of calculated column as number instead of single line text and select the the checkbox as add to default view as selected.
You r good to go.
I was working on the same issue yesterday where client needs Calculated column and no third party installers. Also the client needed, no changes in sharepoint designer.
All I get in my Status color column is #VALUE! and I follow the 4 steps by Sarah Haase, and did like u said to change the type to number.. need some help!
What version of SharePoint are you using? And at which exact step are you seeing the #VALUE! string?
The Red Baron,
I have never left a comment in a blog; however, I want to send you a huge THANK YOU!!! I am working in SharePoint 2013 and have been trying to figure out how to color code a list item for 3 days now and nothing. I have added a CEWP and html code and a million other suggestions made by various other blogs and simply changing the column type to number from single line of text did the trick!
Thanks again!!
Yes, but with Sarah’s you can do it yourself. With Pentalogic’s, it has to be installed on the server. Business users don’t have access to the servers.
True, it’s a trade-off really. If you have many lists or list view web parts, it may well be worth the effort to persuade your system admin to install the software, instead of spending the time reproducing the XSL changes.
Yeah maybe. 🙂
This solution does not work if you apply Show Tool Bar in Edit WebPart.
Actually, I take that back. I think my problems are more complicated then that. I got this to work on test list but not on the live version. After I add the Tool Bar, I’m not able to select the field which has the HTML tags. The entire view becomes selected when I try.
I tested this out, but was unable to replicate your issue. Here are the steps I followed:
After taking these steps I was able to select items without issue.
Thanks for the Reply Sarah. I have followed all the steps. I think the problem is related to my list being grouped on two fields and collapsed. For me to follow the steps I have to create the view expanded, edit the tag in SPD, then change the view to collapsed. The last step is to edit the Web Part to Show the tool bar. When I am able to get the colored bullets to display, the list becomes unstable. Sometimes I’m able to select a row, sometimes I can place a checkmark on a row but once I move the mouse off the row, the checkmark goes away.
Hi Sarah, although it’s a possible approach, I find it too heavy on the JS side. MOSS pages are known for having their huge and complex HTML markup composition (still must be coming from the old timers at MSFT…) and the JS script mentioned basically selects all the on the page. This is bad. And it is even worse on a MOSS page, which is already heavily fustigated by HTML (the famous nested tables), CSS, javascript. That is almost insane. In my laptop I had to wait at least 5 seconds for the JS to complete on a very small list (15 items). I’ve had a lot of cases where I though “hmmm JS can do it”, but in practice, it brings a lot of issues, and this is just one of them, so it must be used carefully. Even with jQuery and selecting just the specific elements I want, its still too troublesome, thanks to the HTML which goes as well against W3C standards…
Not to even mention, if something changes in the HTML page, which could cause the code to crack, you’re done.
For me, this is not worth the trouble, sorry for that… Either use the old boring OOTB options, or just use a custom programmed column…
I sure hope MSFT changes a lot in MOSS 15. Because MOSS 2010 is in a lot of aspects inheriting still a lot of “evil” from MOSS 2007.
Regards,
Tiago
Just a correction, when I mentioned “(…) and the JS script mentioned basically selects all the on the page. This is bad.(…)” I forgot the part so I meant:
“(…) and the JS script mentioned basically selects all the on the page. This is bad.(…)”
Now I figured out the messages are filtering the tags, so I meant ““(…) and the JS script mentioned basically selects all the “TD” on the page. This is bad.(…)”
I’m trying to get one column (Status) in a list to pull from another column (Utilization) in a list and display the appropriate traffic light color (Sharepoint).
70 but 80 but 90 to display the saved red traffic light
Example:
Utilization data entry is 74, I want a yellow traffic light to appear in the Status Column.
I’ve tried the examples already provided on the page but for some reason it didn’t work for me.
If I’m following, you want to display red, yellow and green based on numbers in a range from 70-100. You can experiment with building out a complex formula to handle this, but I’d try out a simpler approach that uses 2 calculated fields. First, you create a calculated column that reads your Utilization values and translates them into simple numeric values of 1, 2 or 3 (e.g. red = 1, yellow = 2, green = 3). Then use your Status calculated column to read your simple numeric values of 1, 2 or 3 and display your traffic light HTML tags. For more information on the calculated fields, see http://blog.pathtosharepoint.com/2008/12/09/color-coding-more-examples/ and https://sarahlhaase.wordpress.com/2012/07/24/modifying-calculated-column-formulas-based-on-values-selected-in-other-metadata-fields/
The solution worked great on the list, however when I add the list view webpart to another page in SP 2010, it is showing the DIV tags!
You’ll need to modify the tag on EACH page you want the Calculated column to display.
I really appreciate it ! Works fine for me in Standart View, but if I select DataSheet View or Export to excel it is showing the DIV tags. I couldn’t find where to change it. Any idea ? Thanks in advance,
Since the datasheet view and the Excel export view don’t include a native ability to render the HTML DIV tags, there’s no way to show the color coding on those views.
You may want to have a look at this DataSheet FAQ on SPSE: http://sharepoint.stackexchange.com/q/23364/1529
This works great if I show “all items” in my list. However, when the list view web part is showing a list view with grouping, it shows the DIV tags. For example, I am grouping on owner. When you expand the owner group within the webpart, instead of showing the formatting, it shows the tags.
I avoid displaying my taffic lights on Grouped views, as I also have trouble getting them to render appropriately. Would love to hear any solutions folks have found for this…
I am playing with this and so far so good! I ungrouped the view first, then edited in Sharepoint Designer, then re-grouped the view. Seems to work as it should though I have only tested it out for about 5 minutes so far.
I had the same problem and when I created a new view and made Group by “Extended” as the default setting, it worked!
Hello Sarah,
I just tried the above step on SPD 2010 and after I copy the disable-output-escaping=“yes” into the formula I get an error? – Failed setting processor stylesheet : 0x80004005 : the value of the ‘disable-output-escaping’attributmaonly be ‘yes’ or ‘no’.
I have verified my spelling and tried it sevaral times. Please note I did not download the TextToHTML-v2.1.1 file (not authorized error was displayed). But since I have 2010, I did not think I needed it regardless.
Any ideas what is happening?
Thanks…
I found my error….I cut and pasted disable-output-escaping=“yes” and when I re-typed “yes” I recognized the quotes were in not in the same format. Now it works!
Re; The solution worked great on the list, however when I add the list view webpart to another page in SP 2010, it is showing the DIV tags!
Sarah’s answer was: You’ll need to modify the tag on EACH page you want the Calculated column to display.
Question: I went to sharepoint designer, the instructions above only cover modification for list, but not page. Can you please advise me how to make this change?
The changes are the same–the changes just need to be made to your page instead of your list view. Use SharePoint Designer’s nav tree on the left to find and open your page.
Hi,
I am doing the same thing, and attaching the script in a cewp web part afetr the list web part. However, in the list web part, I am using the list view – Preview Pane. I still see the html code. Do you have any suggestions?
I followed your user guide step by step but when creating the indicator column it always tells me, that the syntac I’m using is wrong?
If you’re copying and pasting the formula, I’d double check to make sure you haven’t dropped any characters. If that fails to resolve the issue, I’d try hand-keying the formula in. (This should help to ensure none of the characters are being changed during the copy/paste.)
Hi Sarah,
thanks for the speedy reply. I did double check the text I copied and I also keyed in the formula manually but it still tells me it is an invalid formula. Are there any SharePoint Settings (security settings), which might prevent me from using HTML code in calculated columns?
Alright, I used SharePoint Designer to create column and then it worked :o)
Hi Sarah,
Great solution, I have a requirement for a color coded SharePoint list such as a list of towns indicating the danger level i.e. red = high, amber = normal and green is low.
Each town has a specific level of threat, how can this be implemented. The result would be to have the following columns town (back ground color coded) and danger level (color coded included the word i.e. high, low)
I hope this makes sense,
Thanks
Aj
When I need to background shade several cells within a list item, I usually opt to use conditional formatting in a SharePoint Designer data view web part. Have you considered going this route?
When I click to download a copy it wants me to sign in with an MSID?
You should be able to do a right-click and Save As of the HTML file. No login required.
Hey Sarah,
i am just trying to get same functionality like you. But when i am adding formula to calculated columns then in list view its not showing my formula, showing its self “#Value!” as you said its supposed to show formula before i apply to html script. please let me know what is the cause of showing “#Value!” in calculated field.
That’s the standard symbol that something in your formula doesn’t compute. I’d try re-copying the formula or keying it in by hand to ensure you have everything in its place.
Hi Sarah,
very nice article.in my recent project client want color coding with datasheet view. Do u have any exerience color coding with datasheet view, if you have please share. please suggest if there is any way to achieve that.
Thanks
To learn more about datasheet views and their limitations, I’d recommend visiting http://sharepoint.stackexchange.com/questions/23364/understanding-data-sheet-view-list-better-in-sharepoint-2010
Another solution:
http://www.sparqube.com/sharepoint-status-indicator/
easy to use, No XSL code required, condition editor, but it is not free.
Would love to find a workaround for those of us without SPD access to hid the div tags. Free preferred 🙂
Hi Sarah! This is awesome!! Thank you so much for figuring this out and sharing it with the rest of us. You are greatly appreciated! I was able to get this to work for my task list, however I cannot get it to replicate on the homepage, even though I have done this coding to the “all task” view I am working with and it is selected in the view option for the web part on the home page, but it will not show on the homepage. Any ideas what I am doing wrong here?
Many, many thanks!!
-Heather
Are you seeing the
Hi Sarah,
Thanks for the article. I got the status indicator symbols correctly, but when i filter by the status indicator column, it is displaying the formulas. I need to get the values instead of formula. Please suggest me .
Are you trying to filter using column headers or a view? And are you filtering against the Priority column in your list or the status indicator column? I’d recommend filtering on the Priority column.
Hi Sarah,
Like Srinivas Said, even I have a problem when trying to filter the calculated formula Columns. If you click the filter on Priority Indicator column the Ugly ‘Div’ formulas are displayed, Even though you are gogin to do a explicit filter , how to hide the formulas being dispalyed there?
You can filter against the calculated column that is displaying your traffic lights–using either the column header filter OR the view filter. But remember, when you filter a column you are filtering against the contents of that column. And in this case, your calculated column’s contents are the HTML DIV tags. Your nicely colored traffic lights only render on the display side–they are not the actual content stored in your SharePoint field.
One way around this issue is to avoid filtering on the calculated column you have set up. Rather than filtering on my calculated column that contains the DIV tags, I filter against the field my calculated column is reading from. In this blog post, I created a Priority Indicator calculated column that displays traffic light icons based on the values populated in the Priority column. If I were going to do any filtering in this scenario, I’d filter against my Priority column–not my calculated Priority Indicator column.
Hi Sarah,
Fine let them filter it using ‘Priroty’ Columns only. But in case when accidently they click on ‘Priority indicator’ column Filter it thows a Ugly ‘Div’ commands. How to get rid of it.. is there any way to Hide the filter or filter values from user?
No. This solution is driven by the DIV tags; if there is a desire to eliminate them, I believe a new solution is needed.
Hi Sarah,
I have found the option myself from another blog to remove the filter.. and here are the steps. Hope that helps future sharepoint experts.
Open the desired sharepoint site in sharepoint designer
• Select Lists and Libraries from the Site Objects
• Select desired list / library
• Select the desired view from the views list where you want to remove to remove filter
• Click on advance mode
• Search for the inside
• Now add following desired attribute to all desired columns. (All column are )
as
This is excellant, works a treat. Thanks Sarah 🙂
Hi Sarah,
This works great and your explanation of how to do this is the best on the web…searched for a while before I found this. It’s working for me…but I also get an “Error on page.” message in the bottom left of the SharePoint page. Here’s a copy of the text and I’d appreciate any guidance. If I remove the edit from the tag the “Error on page” goes away. I’m using 2010.
Webpage error details
User Agent: Mozilla/4.0 (compatible; MSIE 8.0; Windows NT 6.1; Trident/4.0; SLCC2; .NET CLR 2.0.50727; .NET CLR 3.5.30729; .NET CLR 3.0.30729; Media Center PC 6.0; InfoPath.3; MS-RTC LM 8; .NET4.0C; .NET4.0E)
Timestamp: Thu, 8 Nov 2012 07:31:12 UTC
Message: Sys.InvalidOperationException: Type SP.EnumerableArray has already been registered. The type may be defined multiple times or the script file that defines it may have already been loaded. A possible cause is a change of settings during a partial update.
Line: 1717
Char: 42
Code: 0
Thanks, Jack
Hi Jack –
Unfortunately, I’m not able to re-create the error on page. Are you using IE8?
Yes, IE8. I’m going to work with our SP Admin as I believe there may be a ‘larger’ issue not related to your fine work. I’ll ping you again if we eliminate other possibilities. Thanks Sarah.
Hi Sarah,
I follow the steps of the solution and only at the end we have found a problem in teh view. He have done the changes in the SPD 2010 and I look the red cicle, save and when I go to the view in Sharepoint I look the text
=”<DIV style='font-weight:bold; font-size:24px; color:"&IF(TiempoCaducidad•”
Please, can you help me?
Hi Sarah,
This works great until I save in SharePoint Designer, when I click the preview icon or refresh the relevant webpage i get “Unable to display this Web Part. To troubleshoot the problem, open this Web page in a Microsoft SharePoint Foundation-compatible HTML editor such as Microsoft SharePoint Designer. If the problem persists, contact your Web server administrator.”
I doubt this is down to permissions as the account I used to do the customisations has full control /site coillection admin access and is in the Farm Admin group too. I checked the logs and no joy there either
Hope you’ve come across this before?
Chet
Since you are able to make (and save) your changes in SharePoint Designer, this is clearly not a permissions issue. More likely, you have made a mistake entering your code in SharePoint Designer or have entered the code in the wrong location. I recommend backing out your changes and trying it again from the beginning.
Thanks Sarah,
i left it for 5 mins and it now loads correctly after a few refreshes 🙂
however when attempting to display the item menu I get the error “This item is no longer available. It may have been deleted by another user. Click OK to refresh the page.”
If I click the ckeckbox for any individual item, only the “New Item” option in the ribbon is available and the rest are greyed out. The only way in is to click on the title to open the item then click “Edit Item” – very strange and should keep me busy for a few more hours today.
Hi Sarah,
This is very helpful. My users want to be able to select the priority indicator themselves rather than utilize a calculated column to render. How do I go about doing that so it is more manual rather than calculation based? Your assistance would be appreciated!
Have you tried using a manual KPI instead?
Here’s an example using the same technique to display “Traffic light” images from /_Layouts. Change the Column name (Project Status) and status values (Red, Orange, Yellow) to suit your needs:
=””
I have tried to follow the guide by I get a “The formula contains syntax error or is not supported” when I try to save my calculated field. I use MOSS 2007
That means something in your formula is not correct. I would suggest copying and pasting it again or typing it in manually. If you’re still having trouble after that, post the formula you’re using here as a comment and I’ll take a look at it.
Dear Sarah,
This is the formula I use. I have now tried to type it in manualle but I get the same error message when I hit save.
The formula contains a syntax error or is not supported.
Troubleshoot issues with Windows SharePoint Services.
=”=’font-weight:bold; font-size:24px; color:”&CHOOSE(RIGHT(LEFT(Priority,2),1),”red”,”orange”,”green”)&”;>•”
I hope you can point to where the problem migth be.
Thanks in advance
Check your email for an updated formula…
Missed a ‘ but unfortunately it does not change anything.
=”=’font-weight:bold; font-size:24px; color:”&CHOOSE(RIGHT(LEFT(Priority,2),1),”red”,”orange”,”green”)&”;’>•”
Hi Saral – finally got it to work together with one of our SP experts. We used a slightly modified calculated field, but it works 🙂
=”•”
My status field is a drop-down list with three value: red, yellow and green.
By the way do you have any experiance with changing the layout of the Our Of the Box KPI List e.g. adding custom fields to the view?
I know you can’t add/modify columns on KPI lists for MOSS 2007 without using custom code. I believe the same holds true for SharePoint 2010, but I haven’t tested to confirm.
I’d love to give this a try – but everytime I try to access the Path to SharePoint site to get the text file, I’m prompted to log in. In all likelyhood, I’m doing something wrong…. but it seems pretty simple. Go to library, download file.
If you get prompted to log in, try clicking on the Cancel button.
I did try that – no dice. But i found if I viewed the file, I could see the text. I copied and pasted into another text file and it worked perfectly. Thanks!! And thank you for your quick response!
Has anyone been able to get this to work with views that group items? Part of the requirements of the list I’m working with is to be able to view these traffic lights when grouped by a particular field (in this case, we’re rating the performance of particular individuals). When I use this solution in the all items view, everything works perfectly. When I edit the views in SPD for views with groupings, I get the following error even though everything in SPD for that view looks great:
Unable to display this Web Part. To troubleshoot the problem, open this Web page in a Microsoft SharePoint Foundation-compatible HTML editor such as Microsoft SharePoint Designer. If the problem persists, contact your Web server administrator.
Correlation ID:9c433f38-0027-4310-a84c-929e191fda14:
I want to change the color of the ‘Title’ to red when its priority is High.
suggest me its formula
The HTML formatting discussed here alters the look and feel of calculated columns–not core columns like the Title field. If you want to shade the background color of your Title field or change its font color, I’d recommend looking at conditional formatting via a data form web part.
Hi Sarah,
This post was SUPER helpful. I have a couple of questions though as I’ve exhausted the trial and error route. In the indicator column I no longer want to base it on the priority column. Instead I would like to base it on another calculated column. That column is an output of the 1, 2, and 3 values for high, normal and low. I get errors every time I make the slightest edit to the formula. The formula that I’ve been using is below. Thank you in advance!!
=”•”
Candice – You can make this kind of change. All you need to do is modify the “source” field that your formula is pointing to. In the example formula provided below, note the word FieldName. This is the name of the “source” field you want to render color formatting based on. Just change the words FieldName to match the name of your calculated column and the formula should work.

Hi Sarah,
I implemented this on a basic project status updates list however I cannot edit the GANTT view in SPD to edit the the tag?
Any help please?
I was unable to edit the Gantt view in SPD either. Anyone else have a solution for this?
I copied a jquery script (from: http://stackoverflow.com/questions/12021211/jquery-to-modify-sharepoint-2010-column-width) referenced via a CEWP and was able to set the default column widths and zoom to monthly or quarterly view by default.
I did investigate if I could add to the script to do the SPD changes (disable-output-escaping=“yes”) via another line of script but no joy. Unless we have any developers reading this??
Sarah,
I have setup a calculated column in a list to display a color-coded “traffic-light” based on a percentage in another column. The display works fine like you discussed above. However, the column filter still shows the text containing the “” tags. Is there a way to modify how the filter works so that it would display the color also? I know how to disable the filter for a column, but it would be nice to filter using the colors instead of the text. Any ideas?
Unfortunately, I don’t have a resolution for this scenario. I’d recommend you use the percentage column to do your filtering OR build a data form web part to display conditional traffic lights based on values in your percentage column.
Sarah this is exactly what i need (red, amber, green) but i don’t want to use a Priority column like in the example. I’m getting #value. 🙂 I didn’t know the difference between the lite and the full version of the script, or whether to download the .htm or .txt version. Which is it? Even when i say “save target as”, it tries to save the .txt file as .htm. I overrode that once but didn’t fix my #value. In the fomula examples you gave, i edited and changed Priority to [RAG text]. I assume i need to change what position it’s looking for a particular character to help the formula discern what it finds? Am i going about this too difficultly? 🙂
Hi Paul –
Several problems here by the looks of it 🙂 You want to download the HTM file, not the TXT file. And yes–you want the full version not the lite version. When you click Save As to save the file, just key in the file extension HTM manually if it is looking to overwrite. For best results, I recommend doing a complete walkthrough of the setup steps in SharePoint as written (and using the Priority field). Once you get that working successfully you can work on tweaks–including changing your columns. Changing the values you’re looking for in the columns gets dicey very quickly–especially if you’re not very comfortable working with the calculated column code. Hopefully you have a dev you can ask if you get stuck on formula modifications…
Hi Sarah,
Great information. If I don’t have access to SharePoint designer 2010 and can’t install it due to admin restrictions, is there any other way to fix the fields showing the ugly tags in the form view?
Thank you,
John
If you want to incorporate color-coding for SharePoint 2010 using the method I proposed, SharePoint Designer 2010 is a necessity. If that’s off the table, you’ll have to research other options. Possibly an add-on tool or the HTML calculated column offered on Pentalogic.
Thanks for the write up – one question – I am using a custom field that has not had data populated in older records (Sharepoint 2010). Is there a good way to catch the #VALUE exception output and just make it a black bullet?
I’m afraid I don’t have a formula fix for that yet. Anyone else?
In the meantime, can you populate a standard value in all the older columns to ensure that the #VALUE exceptions don’t display?
Hello Sarah,
I managed to find a way:
=”0,CHOOSE(RIGHT(LEFT(RAG,2),1),”red”,”orange”,”green”),”black”)&”
;’>•”
Now the problem is sorting – the drop down for filtering leaves something to be desired and doesn’t always work correctly.
Any thoughts there?
-P
Are you referring to the
Hi Sarah,
I tried your approach to display the color coding in List and it worked successfully. However, when I click anywhere in the list item and opent it or update the .. . shows in the DispForm/EditForm.aspx Please help on this one.
A big thank you for your contribution!
You do not need Text2HTML or SPD perse to get HTML code in Calculated Columns to display.
Check out http://e2.nl/icc
Hi Sarah,
I did as you said and made the “Priority” column and the example works great. Can I take values from a calculated column and do the same thing? I have a formula that calculates from a date to a system date, figures out the workdays and if the workdays exceed a threshold, in this case, 15 days, the formula returns “Red”. I tried to modify your code so I could get the indicator to light red based on seeing the value coming from the calculated column.
Kent
Yes–you can use values in a calculated column. Take a look at my comments posted on Jan. 4, 2013 for the formula tweaks you’ll need to make.
Hello
I would like to nest 8 of these images (columns R1,R2,R3,R4,R5,R6,R7,R8) together in one calculated column (=R1&R2&R3&R4&R5&R6&R7&R8), but when i try the images are alligned vertically. Is there a workaround to get them horizontal.
Regards
Clayton
Hi, I used the KPI option on my site and it all worked brilliantly, only problem is when I now try to login to the page this is on I get HRESULT: 0x80020009 (DISP_E_EXCEPTION)) error. Anyone else had this issue, all the pages that do not use the solution here work perfectly
Thanks for detailing all the steps. I use pathtosharepoint regularly. One thing that continues to annoy me is the alignment. Is there a way to fix the vertical alignment of the traffic symbols so that they are in line with the text and not appearing lower?
Sarah – this is amazing and quick and it works – thank you.
However, I have a related issue that is driving me nuts and I would very much welcome your advice please:
When I opened my list in SharePoint Designer 201o to modify it. I recieved the message “File is under source control do you want to check it out?”
So, I selected ‘Yes’, made the changes described in your post but now I cannot see how to check the file in, and I think that it is because of this that the only person who can see the pretty traffic lights is the site collection administrator who made the changes. Everyone else sees the HTML tags.
OK – scrub that – I’ve worked it out.
1. Open the site in SharePoint Designer
2. Click ‘All files’ in the left-hand, site objects panel
3. Select ‘Lists’ in the ‘All files’ panel
4. Richt-click and Check-in the list in question.
Thanks again for your blog here Sarah. Thanks to you, my list looks great now.
John.
Sarah – Thank you for sharing this. I am having a challenge with nested “” tags show up. I follow these steps for Traffic light and I see the color code. I am trying to use a progress bar example and am not able to display the color. I copy the HTML tag into a file and it displays fine, so I know the syntax is correct. Here is the nested tag that I derive in the calculated column =””. Any assistance would be greatly appreciated. I am using Sharepoint 2010
Sarah – Thank you for sharing this. I was trying to implement a Progress bar and it is not displaying the color. I went through this example and was able to display the traffic light color. Followed the same steps for Progress bar and the color does not appear. Here is the final value I get from the calculated column “”. I copy this code into a html file and it displays fine, so I think the syntax is correct. Any help will be greatly appreciated. I am using SP 2010.
oops, I guess the code did not get through, let me try again by removing the brackets around the DIV tag …… DIV style=’background-color:Beige;’>DIV style=’background-color:yellow; width:20%;’>/DIV>/DIV>”. It is a nested DIV tags
I figured it out
Hi. i noticed that after pasting the code in step 4…..
[Add a new calculated column to your SharePoint list. Paste the HTML formula string you copied into the new column’s Formula field. Click OK to save your changes.]
if you set data type to number before clicking OK, everything works well without having to go through the SPDesigner stuff….tested on sharepoint 2013
thanks otherwise
I have coined the phrase Inline Calculcated Columns
See http://e2.nl/icc for detailed (technical) explanation on why and how this works on 2013 and also older 2010 environments.
It elleviates all the hassles of adding extra javascript script or XSLT code. Does not require SharePoint SPDesigner and, best of all, works on every View where you include the Calculcated Column
oK if I Click on a field, the Edit item View pops up, and the color codes are again seen as HTML codes. Any help on that?
The HTML codes should be stored in a Calculated column. By design Calculated columns do not show up as editable fields. I recommend checking your field type to confirm you have the codes set up correctly.
Hi Sarah and thank you very much for your tips. I had a problem in downloading this file
http://pathtosharepoint.com/Downloads/TextToHTML-v2.1.1.txt
Which I believe is the most important to make the list to work.
It require username and password.
Do I need to be registered somewhere? How can I get that file and try if also in my list all this works?
Thank you for the help.
Antonio
No need to register. If you’re prompted to log in, just click Cancel.
Thank you but it gives me message (401 not authorized acces).
I just re-tested the download and didn’t run into any login or 401 issues. May I suggest trying it out using a different browser or a different PC?
Hi Antonio, to add to Sarah´s reply, you need to right click and choose “Save Target As”.
Do it in Explorer, it works.
Wow, thanks to your simple instructions this works beautifully in a regular view. How can I get the RAG indicators to show up in a view displayed in a web part on a page, though? To complicate things, our MS-hosted SharePoint 2 is part-way through migration from SP2010 to SP2013 so I have to use SP Designer 2013 and it is a total pain to have to hack the code as described at http://www.sharepointblog.co.uk/2012/11/a-look-at-sharepoint-designer-2013/
Hi Sarah,
I used your disable-output-escaping=”yes” successfully on my list. Thanks so much for the solution. Can you tell me how to make this work for the preview pane view that is available for a list ? On the preview pane view, there isn’t a tag available.
edit for the above: there isn’t a xsl:value-of tag
Hi Sarah, I am trying to create a traffic light system for a date column. This is related to if a user is in date for training courses. Example, green if in date, amber if coming to the end of the time period and red if out of date. How do i add say 365 days to 15/10/2013 and have the traffic light as green. but to change to amber once 350 days has passed?
It is a great article. Thanks! I noticed that I started getting errors after I applied it.
List does not exist.
The page you selected contains a list that does not exist. It may have been deleted by another user.
Even I deleted that list, I still get the error in that specific team site! Have you got this error before?
Thank You
Thank you for this solution…it was exactly what I needed and it worked flawlessly.
Excellent Article!
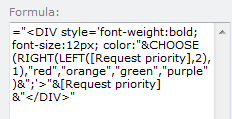
Hello Sarah,
Could you please let me know what should I do if I need a fourth colour?
Many thanks!
To add a 4th color you’ll need to modify the calculated column formula. Here’s an example formula I used to add in a 4th priority level (shaded in purple):
Very Nice article.. Thank you!!!!
Great article Sarah and a great use of utilizing calculated fields as well as HTML, brilliant. I have seen another spot where a SharePoint user discussed adding Images instead of colors that you could reference. The references would be using a conditional statement instead of applying a DIV.
Here is my example.
=IF([Coding] = “(3) Bad”, “red.gif”, IF([Coding] = “(2) Ok”, “yellow.gif”, IF([Coding] = “(1) Awesome”, “Green.gif”)))
Hello Sarah Haase!
This is a very good example of how to use calculated columns to use traffic lights!
It worked!
I have just a quickie question:
There is any way in the formula from calculated column to align the traffic light in the center?
I have tried but it didn’t worked!
=”•”
Could you please help me with this?
Thanks in advance,
Felipe.
I can’t thank you enough for this tutorial! I have been trying to do this for MONTHS, but have absolutely no experience with HTML, or anything beyond basic Excel formulas. There are a lot of blogs that give you the code you need, but I never knew where to use it.. I am a total beginner. After stumbling across this blog, I finished my project in 2 hours, and it looks exactly how I wanted it to!
would this work without choice option – because i have table being imported from access – but just need color coding for the specific cell- and this seems only for the choice menu – is there an option to add this color traffic symbol if the column is not a choice?
Hello – do you have a similar solution for SP 2013?
SP2013 offers Client-Side Rendering (CSR), which is a totally different approach to conditional formatting, color coding, etc. For more information on CSR, check out Wes Preston’s blog post http://www.idubbs.com/blog/2012/js-link-for-sharepoint-2013-web-partsa-quick-functional-primer/.
Hi Sarah Haase Your color coading post helped me to slove my problem
but iam getting one problem by going through it that is, while filtering coloumn wise it showing that “…” code which was writen in the calculated coloumn .I want to show colors in coloumn wise filter please help me to slove that problem thankig you
Unfortunately, there is no way to show the color when filtering the column.
Thanks for your guidence
HI Sarah,
There was a previous question without an answer….Thanks for detailing all the steps. I use pathtosharepoint regularly. One thing that continues to annoy me is the alignment. Is there a way to fix the vertical alignment of the traffic symbols so that they are in line with the text and not appearing lower?
Hi Melinda,
Use the unicode “new moon” symbol (🌑) at 12px. It aligns perfectly.
This is better options: http://sharepoint-2013-solutions.com/how-to-make-colored-status-field-in-editform-aspx/
Hi Sarah,
Your article helped me a lot.I have one more problem.
I have one more options ( (4) NA–>Not Applicable)) to choose from Priority field apart from (1) High,(2) Medium,(3) Low .
I am unable to find the calculated column formula for 4 options in priority drop down field.
I am aware of formula for 3 options in priority drop down field.
i.e,
=””&Status&””
Can you please reply with the formula for 4 options in priority drop down field like above formula.
Your help would me much appreciated.
Thanks and Regards,
Kiran Kumar Talikoti
Sure. This picture shows how I’ve added a 4th option for displaying traffic light indicators for my Priority field.

Yes Its working fine.Thank you so much
Hello! Great article but when I get to step #7-12, I get the not very attractive view and when I add the CEWP at the bottom of the list with the downloaded TextToHTML code, I am not getting the color indicators to replace the code. Any suggestions?
Thanks!
PS. Here was the downloaded code. Do I have to customize it in some way?
PPS. learning this on my own
/*
Text to HTML – version 2.1.1
Questions and comments: Christophe@PathToSharePoint.com
*/
function TextToHTML(NodeSet, HTMLregexp) {
var CellContent = “”;
var i=0;
while (i < NodeSet.length){
try {
CellContent = NodeSet[i].innerText || NodeSet[i].textContent;
if (HTMLregexp.test(CellContent)) {NodeSet[i].innerHTML = CellContent;}
}
catch(err){}
i=i+1;
}
}
// Calendar views
var regexpA = new RegExp("\\s*\\s*”);
TextToHTML(document.getElementsByTagName(“a”),regexpA);
// List views
var regexpTD = new RegExp(“^\\s*\\s*$”);
TextToHTML(document.getElementsByTagName(“TD”),regexpTD);
// Grouped list views
ExpGroupRenderData = (function (old) {
return function (htmlToRender, groupName, isLoaded) {
var result = old(htmlToRender, groupName, isLoaded);
var regexpTD = new RegExp(“^\\s*\\s*$”);
TextToHTML(document.getElementsByTagName(“TD”),regexpTD);
};
})(ExpGroupRenderData);
// Preview pane views
if (typeof(showpreview1)==”function”) {
showpreview1 = (function (old) {
return function (o) {
var result = old(o);
var regexpTD = new RegExp(“^\\s*\\s*$”);
TextToHTML(document.getElementsByTagName(“TD”),regexpTD);
};
})(showpreview1);
}
I figured it out! YIPEE!
Thank you!!!
Changing the column from single line of text to a number did the trick
Hi Sarah,
Your article is great and helpful!
I’ve more than 4 options to choose from Status field.
Example: Status = Not Started (Blue color), Status = Past Due (Red), Status = Need Attention(Yellow), Status = On Track (Green), Status = Complete (White).
Could you please post code for more than 5 options to choose from Priority filed? Appreciate your help in advance!
Thanks,
Rajani
did you receive any response?
You can extend this code to include color-coding for more than 4 options. For quick and easy results, make sure you start off each value with a numeral as shown below.
Next, update your calculated column code to add in more color choices. (You’ll need 1 color name for each of the “choices” you’re setting up in your corresponding dropdown field.) This picture shows my code with 5 color names (all highlighted in yellow):
Hats Off. Really helped me. Couldn’t figure out for three hours without yours and Red Baron help.
Thanks very much
Is ther a solution for this in SP2013? SP Designer 2013 doesn’t have a design view and when I open the list using SPD 2010, it opens in Advanced mode without the design view.
Thank you!
No, this solution does not work in SharePoint 2013. If you are using SharePoint 2013, I recommend checking out Client-Side Rendering (CSR). Wes Preston has a great blog post intro on the topic at http://www.idubbs.com/blog/2012/js-link-for-sharepoint-2013-web-partsa-quick-functional-primer/.
Hello Sarah,
how to add to the code more options? like:
(4) Blue
(5) Purple, etc
You can extend this code to include color-coding for more than 4 options. For quick and easy results, make sure you start off each value with a numeral as shown below.
Next, update your calculated column code to add in more color choices. (You’ll need 1 color name for each of the “choices” you’re setting up in your corresponding dropdown field.) This picture shows my code with 5 color names (all highlighted in yellow):
Very useful article – I refer to this one often.
One thing I did find is that as mentioned above, disable-output-escaping=”Yes” errors, but if you just enter as disable-output-escaping=yes without the quotes then it works.
Works really well… Thank you for sharing this…
Sarah! Thank you SO much, right out of the gate – it worked perfectly! Of course, now the boss would like to see a few tweaks …
Is it possible to change the pick list to:
• On Track – Green
• Minor Variance – Amber
• Significant Variance – Red
Basically, removing the (1) (2) (3) ?
Thanks! I tried doing this myself and futzing with the code … but no go? Thanks!
Hi, tried this but get the following error:
Failed setting processor stylesheet : 0x80004005 : the value of the ‘disable-output-escaping’ attribute may only be ‘Yes’ or ‘No’
I have SharePoint Foundation 2010
Further to my previous query, it’s OK now. I removed the quotes around Yes out of the following section and it worked:
disable-output-escaping=“yes”
Hi Sarah, got a question on filtering the Priority Indicator. If I try filtering this column to show say all normal items, I get the DIV coding. A way around this is just to filter on the Priority column which filters the Priority Indicator also but just to keep things tidy, I wondered if you had come across this and if there was a way of tidying it up.
Thanks.
Very helpful article.
Thanks a lot! 🙂
There is a SharePoint product that does conditional formatting in lists and document libraries. It also allows to resize columns, change font styles and colors and many more – it is called List Booster. Check it out at http://www.spbooster.com
I have used this solution in the past and this works great by the way! I am now working on a different SharePoint site and wanted to add this functionality.
Our SharePoint Systems Support team has modified SharePoint Designer (SPD) since I have last used these instructions. They have changed SPD to the point where the page Data View is no longer an option and changes can only be made through coding.
I have searched through the code to attempt to find the correct tag to edit with the disable-output-escaping=yes information and have not had any luck. Can anyone help me with this?
What version of SharePoint are you using, Joe?
SharePoint 2010
You were looking for the ” tag”? I had the same problem with a view migrated from SharePoint 2007. There was no such a tag. I deleted this view and built a new one with SP2010. This works for me.
This worked really well for me, but the list I created co-exists on a SP page with other web parts. When I navigate to the page as opposed to the list, I lose the colour coding and it goes back to displaying the divx syntax. How do I get the underlying SP page this list is part of to show the views I have created for the list and the colour coding ? I have tried to modify the web part to get the colour coding back, but when I navigate away and return to the page the syntax returns. If I edit the list and modify the view I can get the colour coding back, but then I lose the rest of the page and the other web parts. This page will be a content roll up for senior management, who will never actually need to go to the list in isolation. I wondered if following the moss 2007 instructions might solve this wrt creating a content editor webpart on the page ?I am on SP10 sp2
I want to implement in SharePoint 2016, i could not able to find the tag , please help me how to achieve this. I have added this list as a webpart and want to implement the colors. thanks in advance.
Ramanjjilu,
Were you able to implement the color portion of this task?
Gulam
My list is working but the status is not changing automaticaly when on item is overdue. I have to edit this item and save, then the color is changing. But I want that is automaticaly done.
Hi
I am trying to do the background color on my Priority List (same as above)
I am in SharePoint 2013. (I am not a SharePoint Guru. I don’t code for a living)
I created a calculated column (Color) with this formula:
=IF(Priority=”(1) Critical”,”red”,IF(Priority=”(2) High”,”orange”,IF(Priority=”(3) Medium”,”gold”,”limegreen”)))
I created another calculated column (ColorBackground) with this formula:
=””&Priority&””
Both are Single line text.
I changed the Style of the list to Basic Table (I read I needed to do this).
Here is where I get stuck. I tried to add a Content Editor below the list using different scripts but no luck.
Can someone help?
Hi Sarah,
this post was really helpful except the link to the site with the HTML text file download is broken. Would you happen to have a copy of the text file for the traffic light view to make the appearance change? Thanks in advance.